
New Multi-Component Alloys

Currently the focus on working with metals from e-waste has been on separation technology, that is selecting single metal elements eg., copper and or gold that can re-enter the bullion supply chain. During EPSRC funded research the idea emerged of working with all the metals from, for example, a single device creating opportunities for new multi-component alloys. This approach would have the benefit of not needing to use different chemical compounds to select different metals and so potentially would also reduce the number of steps involved in the metal recovery process. Through this approach we could also potentially discover new metal alloys with novel aesthetic and mechanical properties.
As a starting point I decided to create an exemplar alloy based on data available to explore what properties such an alloy would have, for example how hard the metal is; can it be easily shaped and formed and what are its aesthetic qualities.
The best source of data available was an article by the BBC from 20161 that details the metals in a typical iPhone.2 Certainly, different manufacturers of mobile devices will use different metals and in different quantities. More recent models will most likely have less gold for example, an iPhone 11 has 0.018g of gold compared to the iPhone 6 in 2016 that contained 0.034g of gold. Apple sold around 2000 million iPhones in 2019 that amounts to 3,600,000 grams of gold in a year. IPhone weights range from the earliest models at 135g to the latest models 240g.4 Approximately 17% of the weight is metal – not including the rare earth metals - elements that are plentiful in the Earth’s crust but extremely difficult to mine and extract economically – including terbium, neodymium, and gadolinium. So, determining the metals in a device and their quantities is a notoriously complex issue with some variation.
Metals in an iPhone - 2016
Percentages Metal Weight in grams
0.08 Gold 0.034
0.84 Silver 0.34
0.04 Palladium 0.015
0.003 Platinum 0.001
61.9 Aluminium 25
37.14 Copper 15
100.003 40.39g
The above table details the metals in a 2016 iPhone and their weights in grams. To achieve an alloy that is sufficient in size to work with and that potentially has the best chance of success the weights have been multiplied by twenty-one. This number was chosen as it is the number of devices in a lifetime that an average person is likely to use given that we replace our phones on average every 3 – 4 years. There is a risk in multiplying the copper by twenty-one that this metal could overwhelm our alloy and so one option would also be to leave the copper out of the calculations. Aluminium is known to create quite a brittle alloy and so I decided it was expedient to exclude this material.
Option 1 - iPhone 2016 weights x 21 but leaving out the copper and aluminium as the quantities of these risk overpowering the alloy or making it too brittle to be worked.
Percentages Metal Weight in grams
8.72 Gold 1.428
87.17 Silver 14.28
3.85 Palladium 0.63
0.26 Platinum 0.042
100 16.38g
This would effectively be a silver alloy – not quite electrum (20% gold 80% silver) a known natural alloy. This alloy is perhaps closer to Doré a named alloy (upto 5% gold, 1% platinum and the rest silver). The term derives from the French meaning gilded. Historically, Doré bars were produced as part of the mining and refining process and sometimes from scrap gold. Doré bars were often mistaken for solid gold. This alloy is rarely sold today and may not have been explored for its aesthetic potential.
Option 2 - IPhone 2016 weights x 21 for the number of devices in a lifetime but leaving the original copper percentage from one device but not including the aluminum.
Percentages Metal Weight in grams Melting point (Celsius)
4.55 Gold 1.428 1100
45.51 Silver 14.28 900 - 1000
2.01 Palladium 0.63 1500
0.13 Platinum 0.042 1550 - 1800
47.80 Copper 15 1085
100 31.38g
Working with the original 15g of copper from one device (rather than multiplying by 21) a potentially workable alloy could be created. The balance of silver and copper is close to a 50/50 shibuichi Japanese alloy. Shibuichi is a traditional copper alloy made up of varying proportions of copper and silver sometimes with a little gold. It will be interesting to see what the addition of the gold, palladium and platinum would do if anything – for hardness, colour etc.
Since the 15th Century Japanese artists and crafts people have developed considerable knowledge and expertise in creating and colouring different metal alloys in particular irogane (copper) alloys. Niiro a traditional Japanese patination solution is made of water, and chemical compounds rokushō and copper sulphate. Shibuichi alloys coloured with niiro demonstrate a variety of shades of grey and shakudo which is 95% copper 5% gold when coloured turns lovely purple and blue hues. So there is also great potential to colour these new multi-component alloys. Copper sulphate one of the key outputs from the hydrometallurgy e-waste process could also be used here maximising the use of metals from e-waste in different states and enhancing the circularity of the process.
First experiment
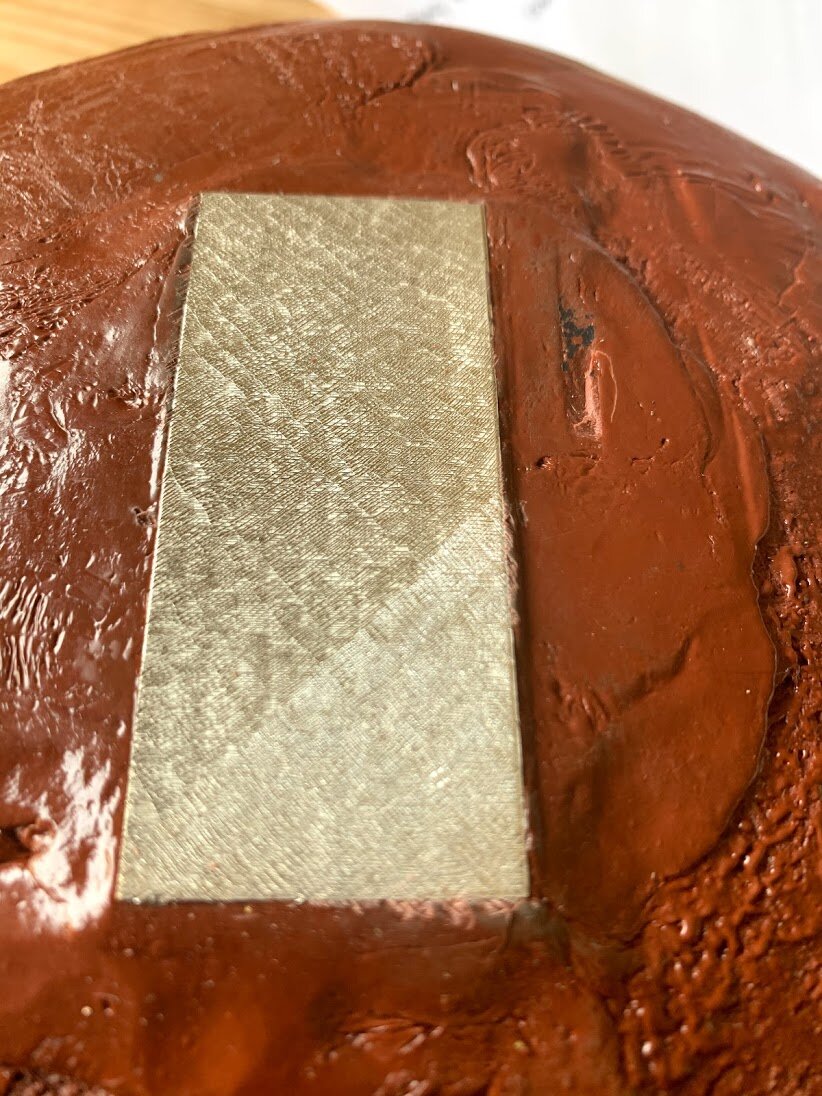
It was decided to move forward with option 2 first as there was some understanding of how this alloy might behave. It was also decided to create the alloy in two parts. Firstly, mixing the gold, silver and copper together and then mixing the platinum and palladium which have higher melting points. Both mixes would then be combined. A Spir-flame multicell electrolyser torch can achieve the higher melting points (see above) required for platinum and palladium. I created a basic mould/crucible specifically for working with this alloy from a graphite block which had been CNC milled using a digital Rhino3D file in the DJCAD digital makerspace. The silver, copper and gold mixture melted and mixed successfully however the platinum and palladium mix did not. I used the biggest tip to melt the platinum and palladium and while it started to melt it appeared to go so far and then stopped. I subsequently became aware that melting palladium in an open crucible is not recommended as it leaves the alloy free to absorb large quantities of hydrogen.

Spir-flame torch mixing platinum and palladium together in a CNC milled graphite block
Second experiment
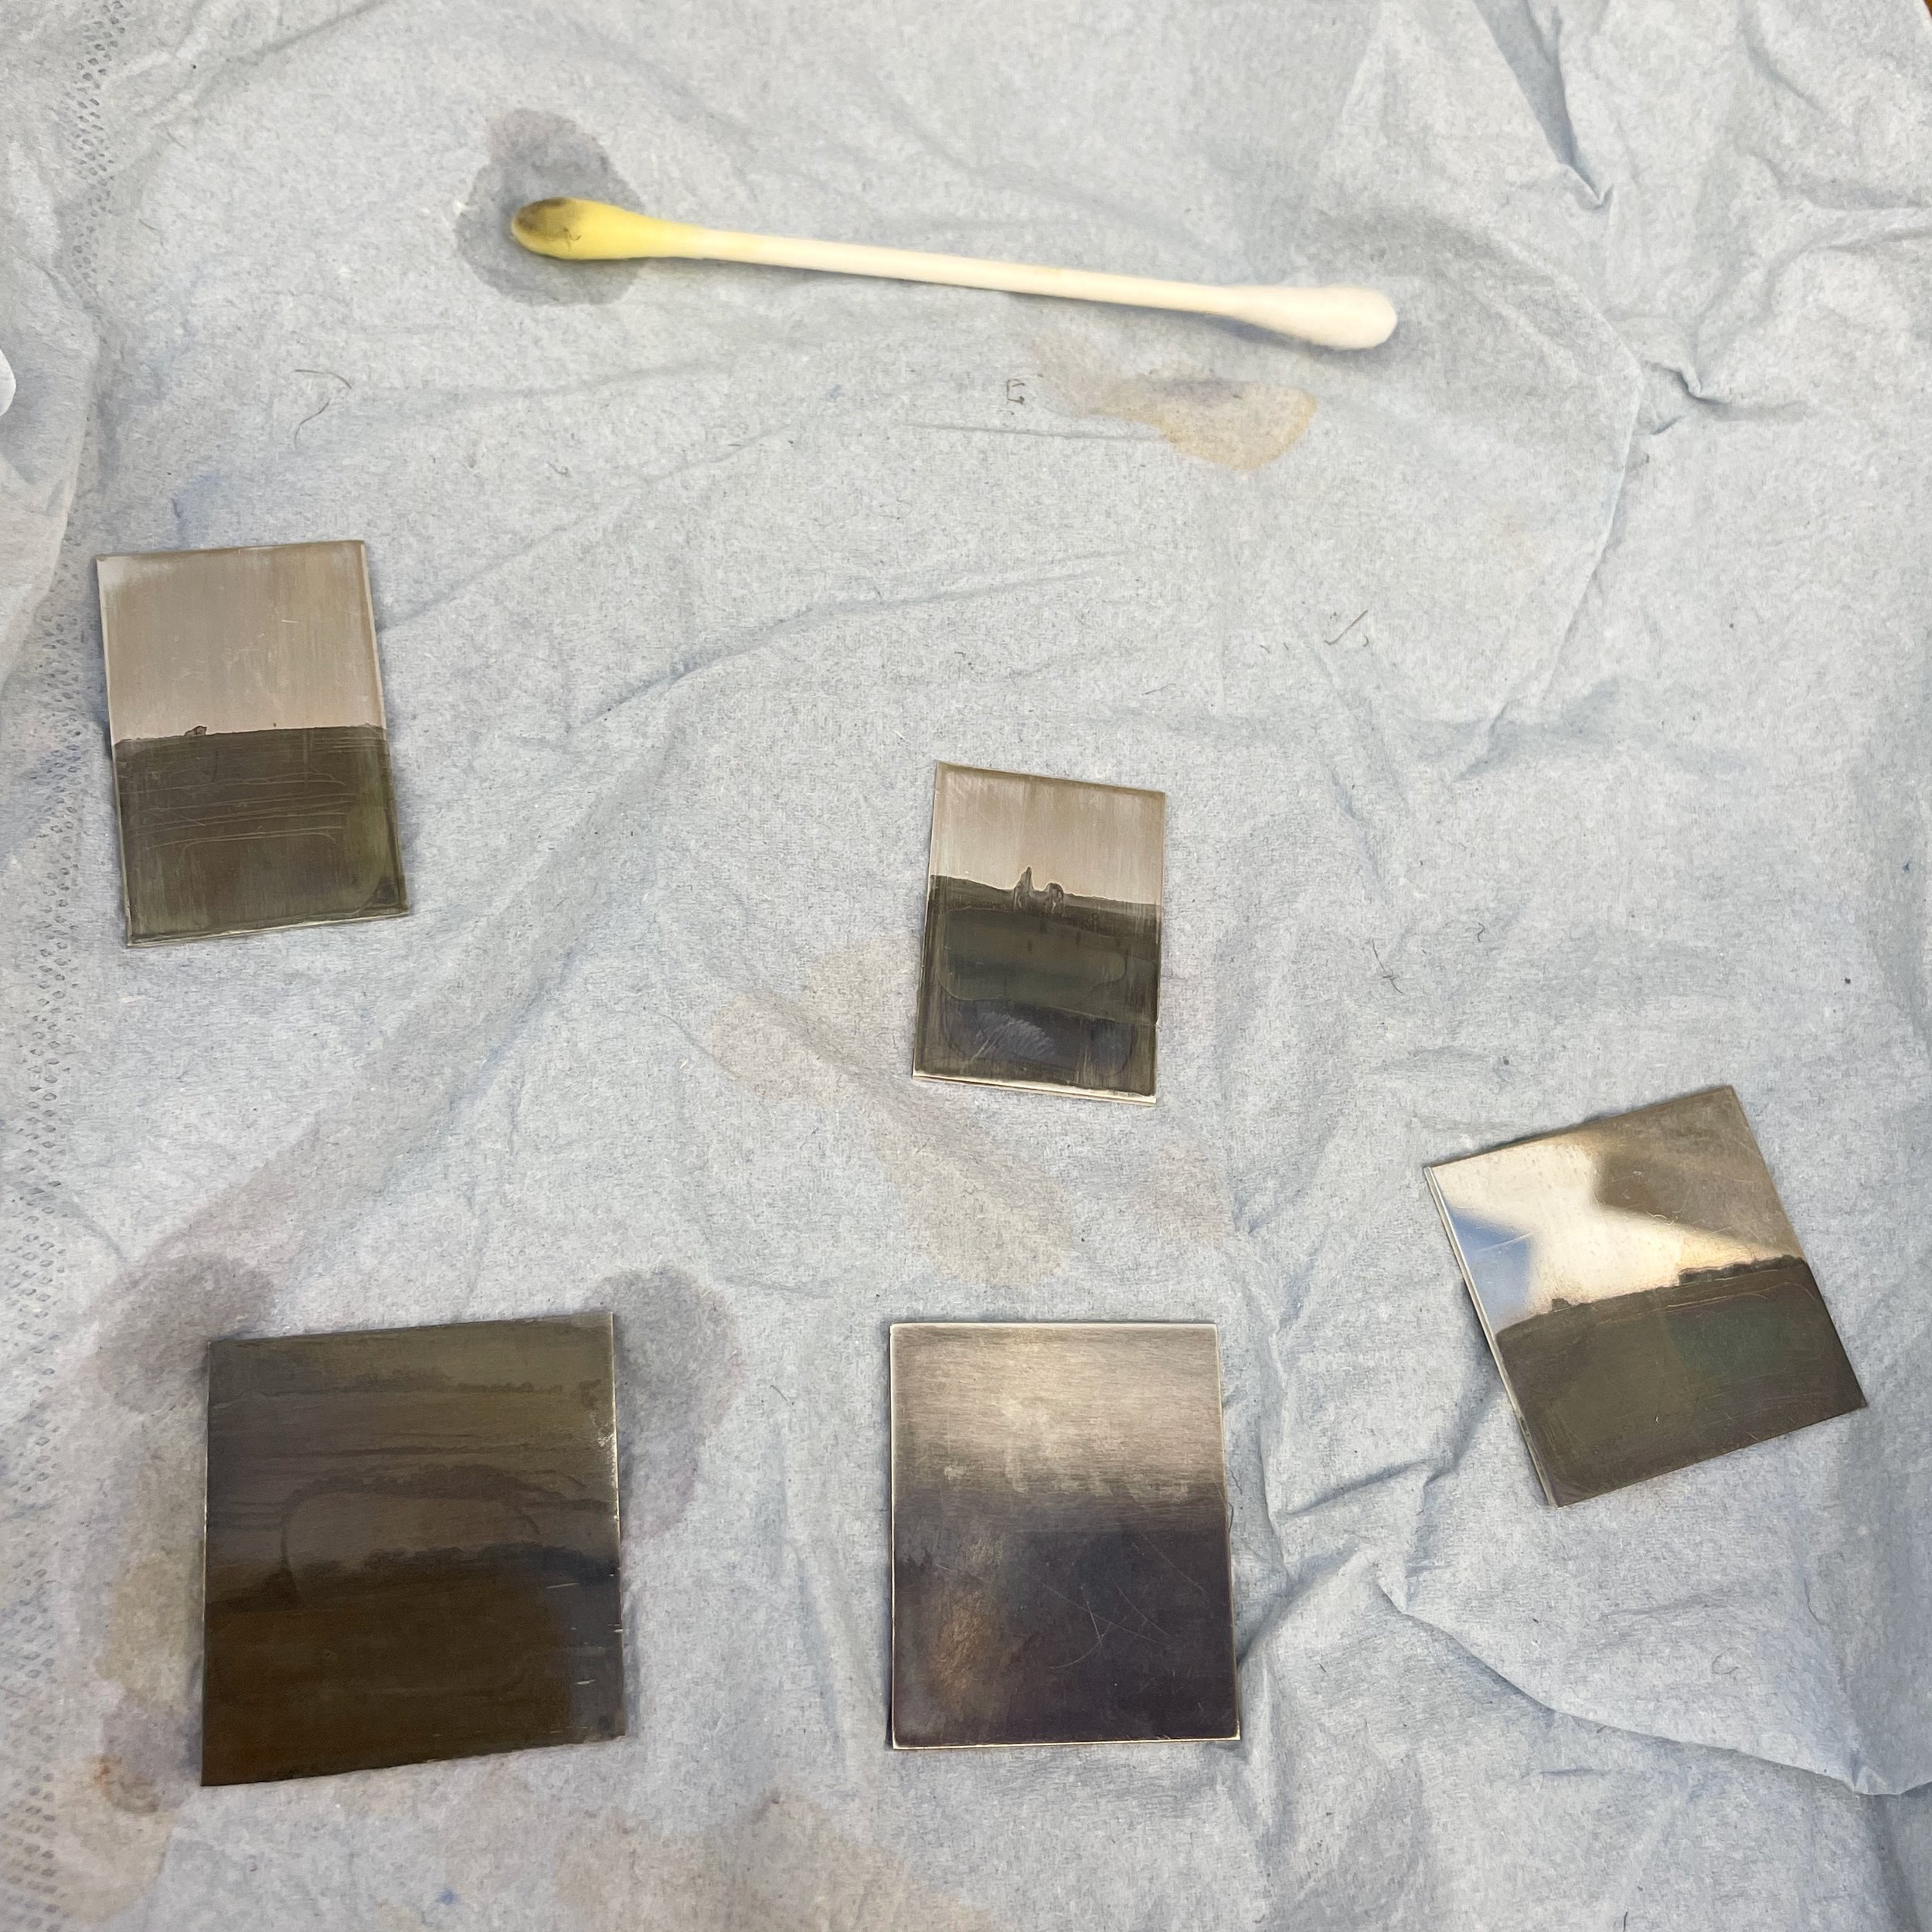
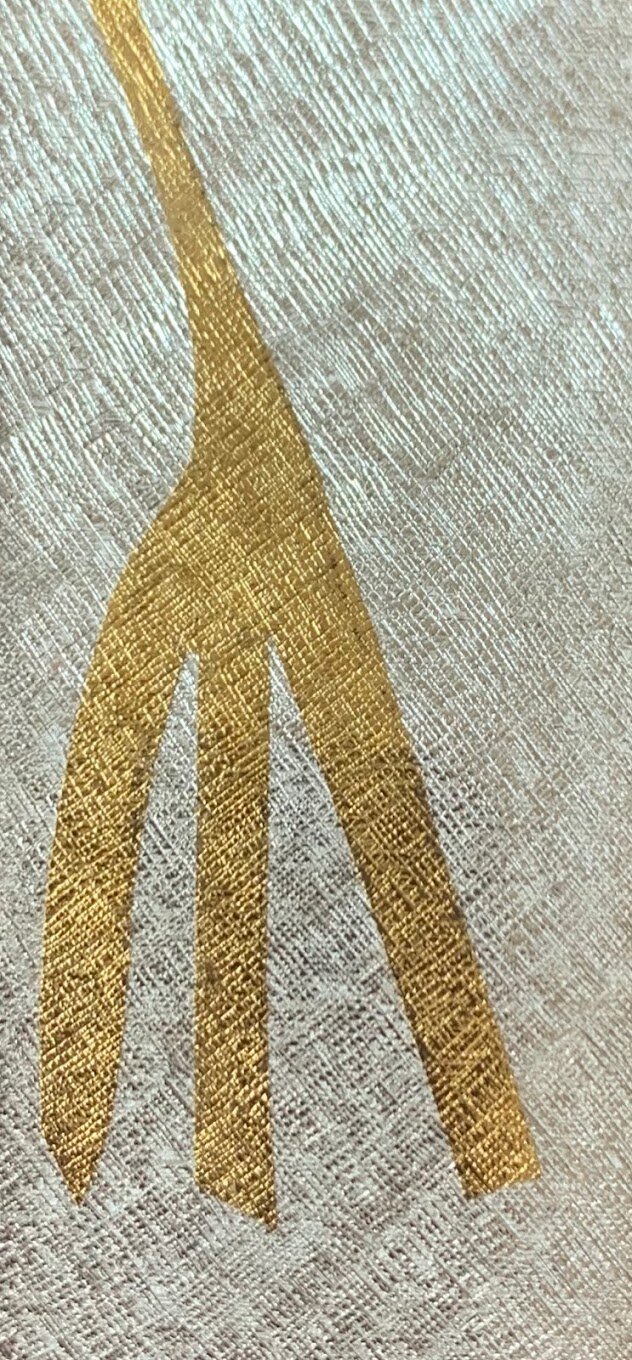
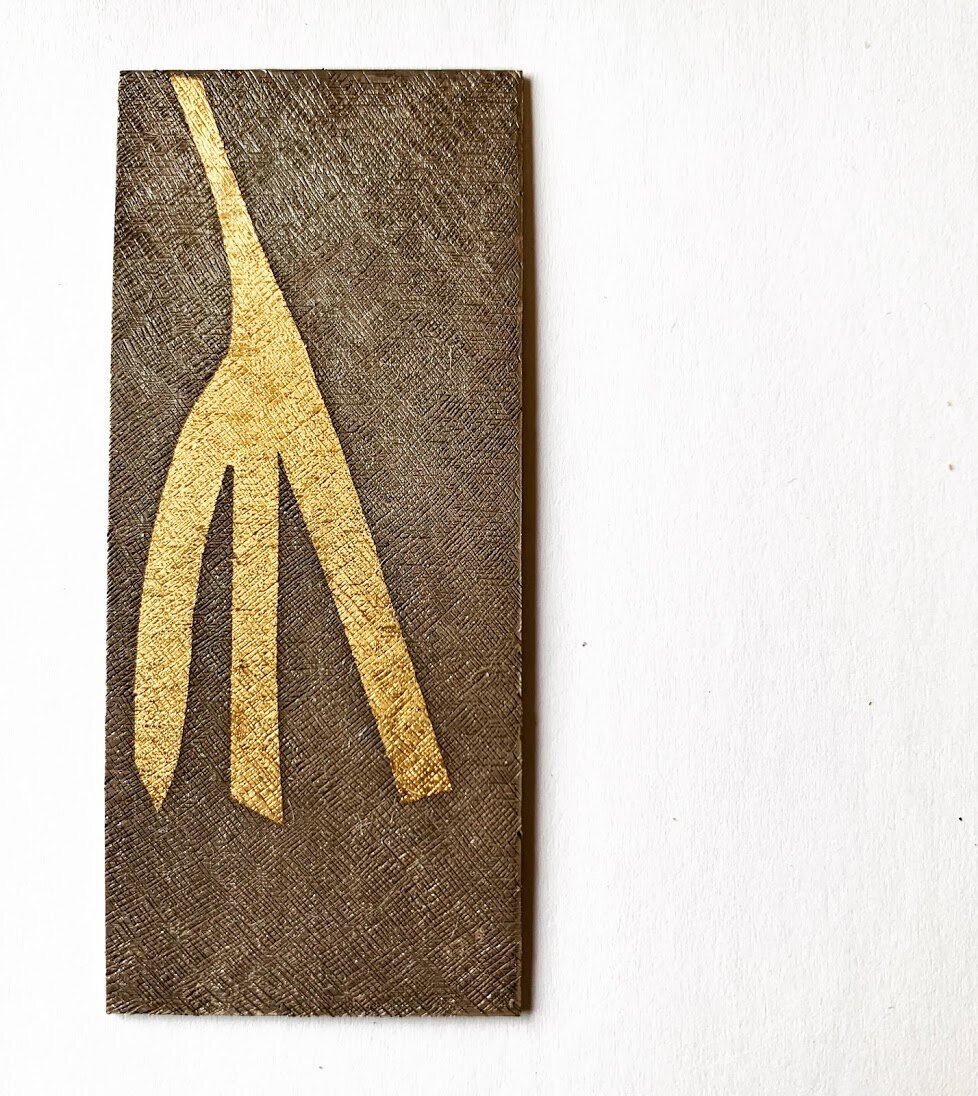
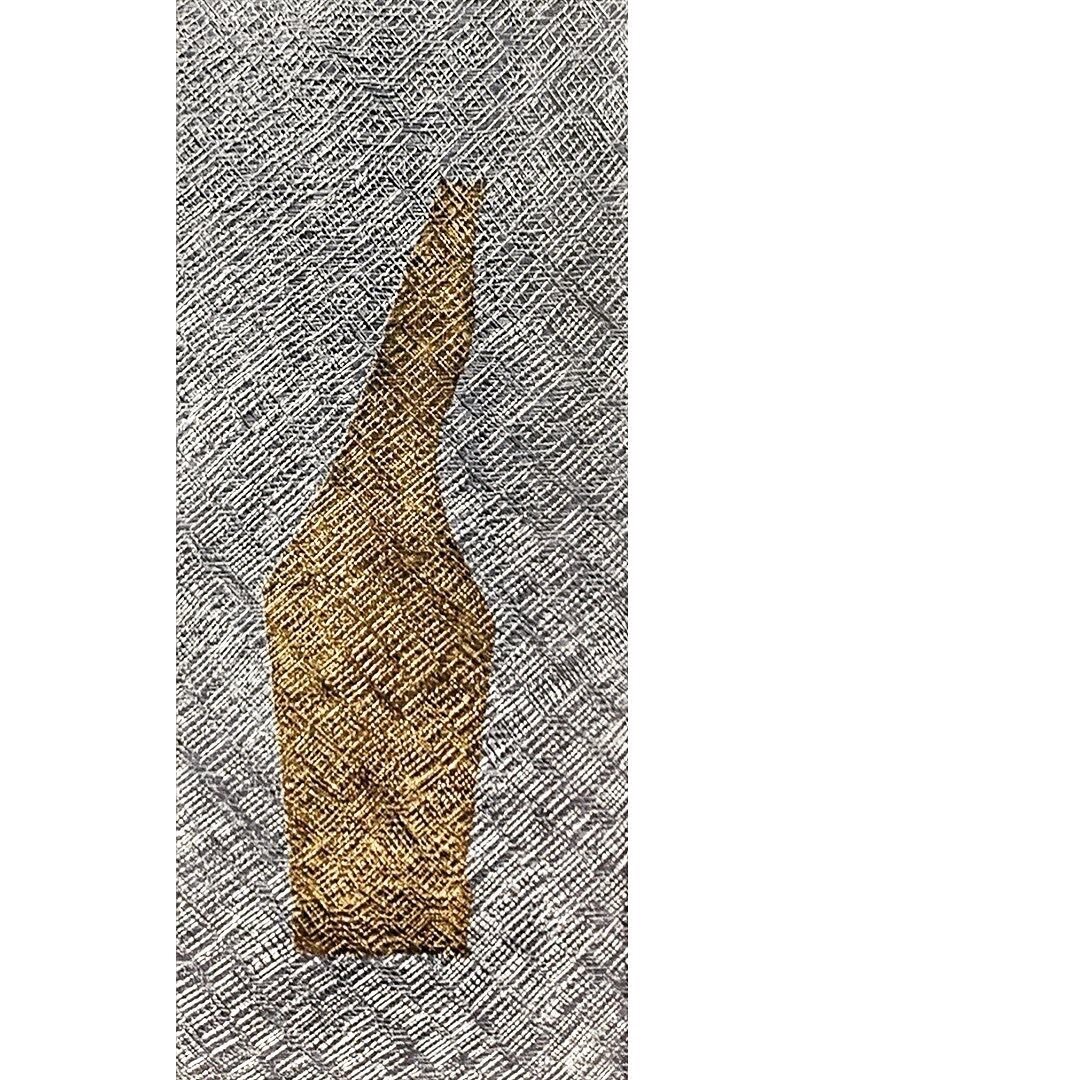
With some assistance from Rautomead a local continuous metal casting company based in Dundee I was able to try the melt test again. They created the phase diagram for the iPhone exemplar alloy and melted the complete sample in one operation in a zirconia crucible in a high temperature furnace. From the images below, it appears the sample has not fully mixed as silver veins are visible on the surface compared to the blacker copper on the rear side. This is known as segregation. Whilst the original intention was to have a fully mixed alloy there could perhaps be some benefit in a segregated alloy for colouring and patination effects.

Exemplar IPhone Alloy next to the zirconia crucible in which it was melted

Exemplar iPhone Segregated Alloy
The next stage is to roll down this alloy into sheet / wire to learn more about its working and aesthetic properties. Ultimately, more work is needed to explore the full potential of new multi-component alloys from e-waste. These could have the advantage of novel properties and great aesthetic potential. The reduced costs associated with creating new alloys could also increase the amount of metal recovery from e-waste and contribute towards meeting UN sustainable development goals specifically those related to responsible consumption and production.
This blog post is an excerpt from the book Brick, Bread and Biscuit: The Chemical Recycling of Electronic Waste for Jewellery Design in India.

Kin-furubi patination
Japanese patination

Sandra Wilson 2024 - Pendant Piece, 950 Silver with Kin-furubi patination in engraved surface 45mm x 40 mm x 1mm.
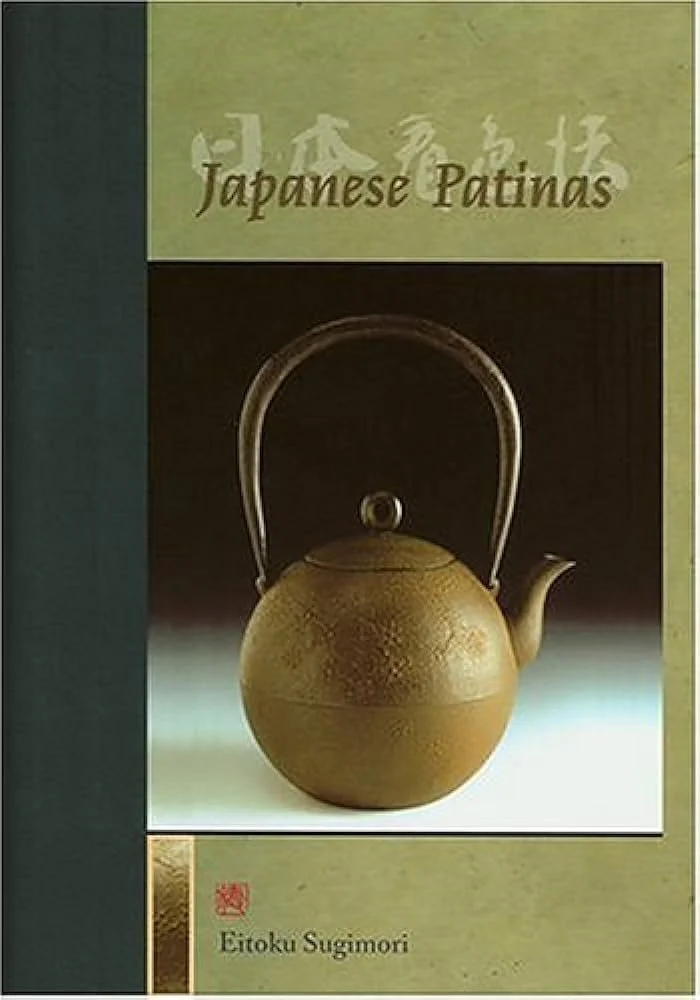
When reading Eitoku Sugimori’s book on Japanese Patinas (2000) - my interest was piqued by a metal patination recipe called kin-furubi. Translated, Kin means gold and furubi means to be old and faded/ time-worn so this is a patination recipe to age metal. In Sugimori’s book he suggests the traditional kin-furubi recipe involves a mixture of pure gold and aqua regia, a potent acid that dissolves the gold. Aqua regia however is a very dangerous chemical and not one I would be interested in working with. Sugimori however also suggests a safer alternative that utilises a gold plating solution mixed with alcohol. Unfortunately this recipe is not very precise and despite speaking to two different plating suppliers in the UK I could not find a solution that I believed could work. As my practice of working with precious metals recovered from electronic waste has become more chemical in nature I was curious as to whether kin-furubi could be a patination recipe that could utilise gold in solution from e-waste.
During my time in Japan last October I was introduced at the Aokin school to Kenji Io the father of Japanese silversmith Koichi Io. Around 25 years ago Kenji co-authored a book on Metalwork Colouring Techniques (see below). The book included valuable information on kin-furubi. The book is in Japanese however google translate was able to provide what I believe is a reasonably good interpretation of the page I was interested in. The recipe described dissolving 1 gram of gold in 7.5cc of nitric acid and 7cc of hydrochloric acid (aqua regia) to make gold chloride. Add the gold chloride to a solution of 250cc of ethanol and finally add a tincture of iodine.

I am fortunate to have research collaborators at Edinburgh University chemistry department who I could get advice and guidance on how to prepare the solution back here in the UK. A UoE postdoctoral research assistant was happy to assist me in preparing the solution. Their advice was to start with a pre-prepared gold chloride powder to which we could add the ethanol and tincture of iodine. In chemistry a tincture of iodine is typically 25 - 60% concentrate in alcohol usually ethanol.
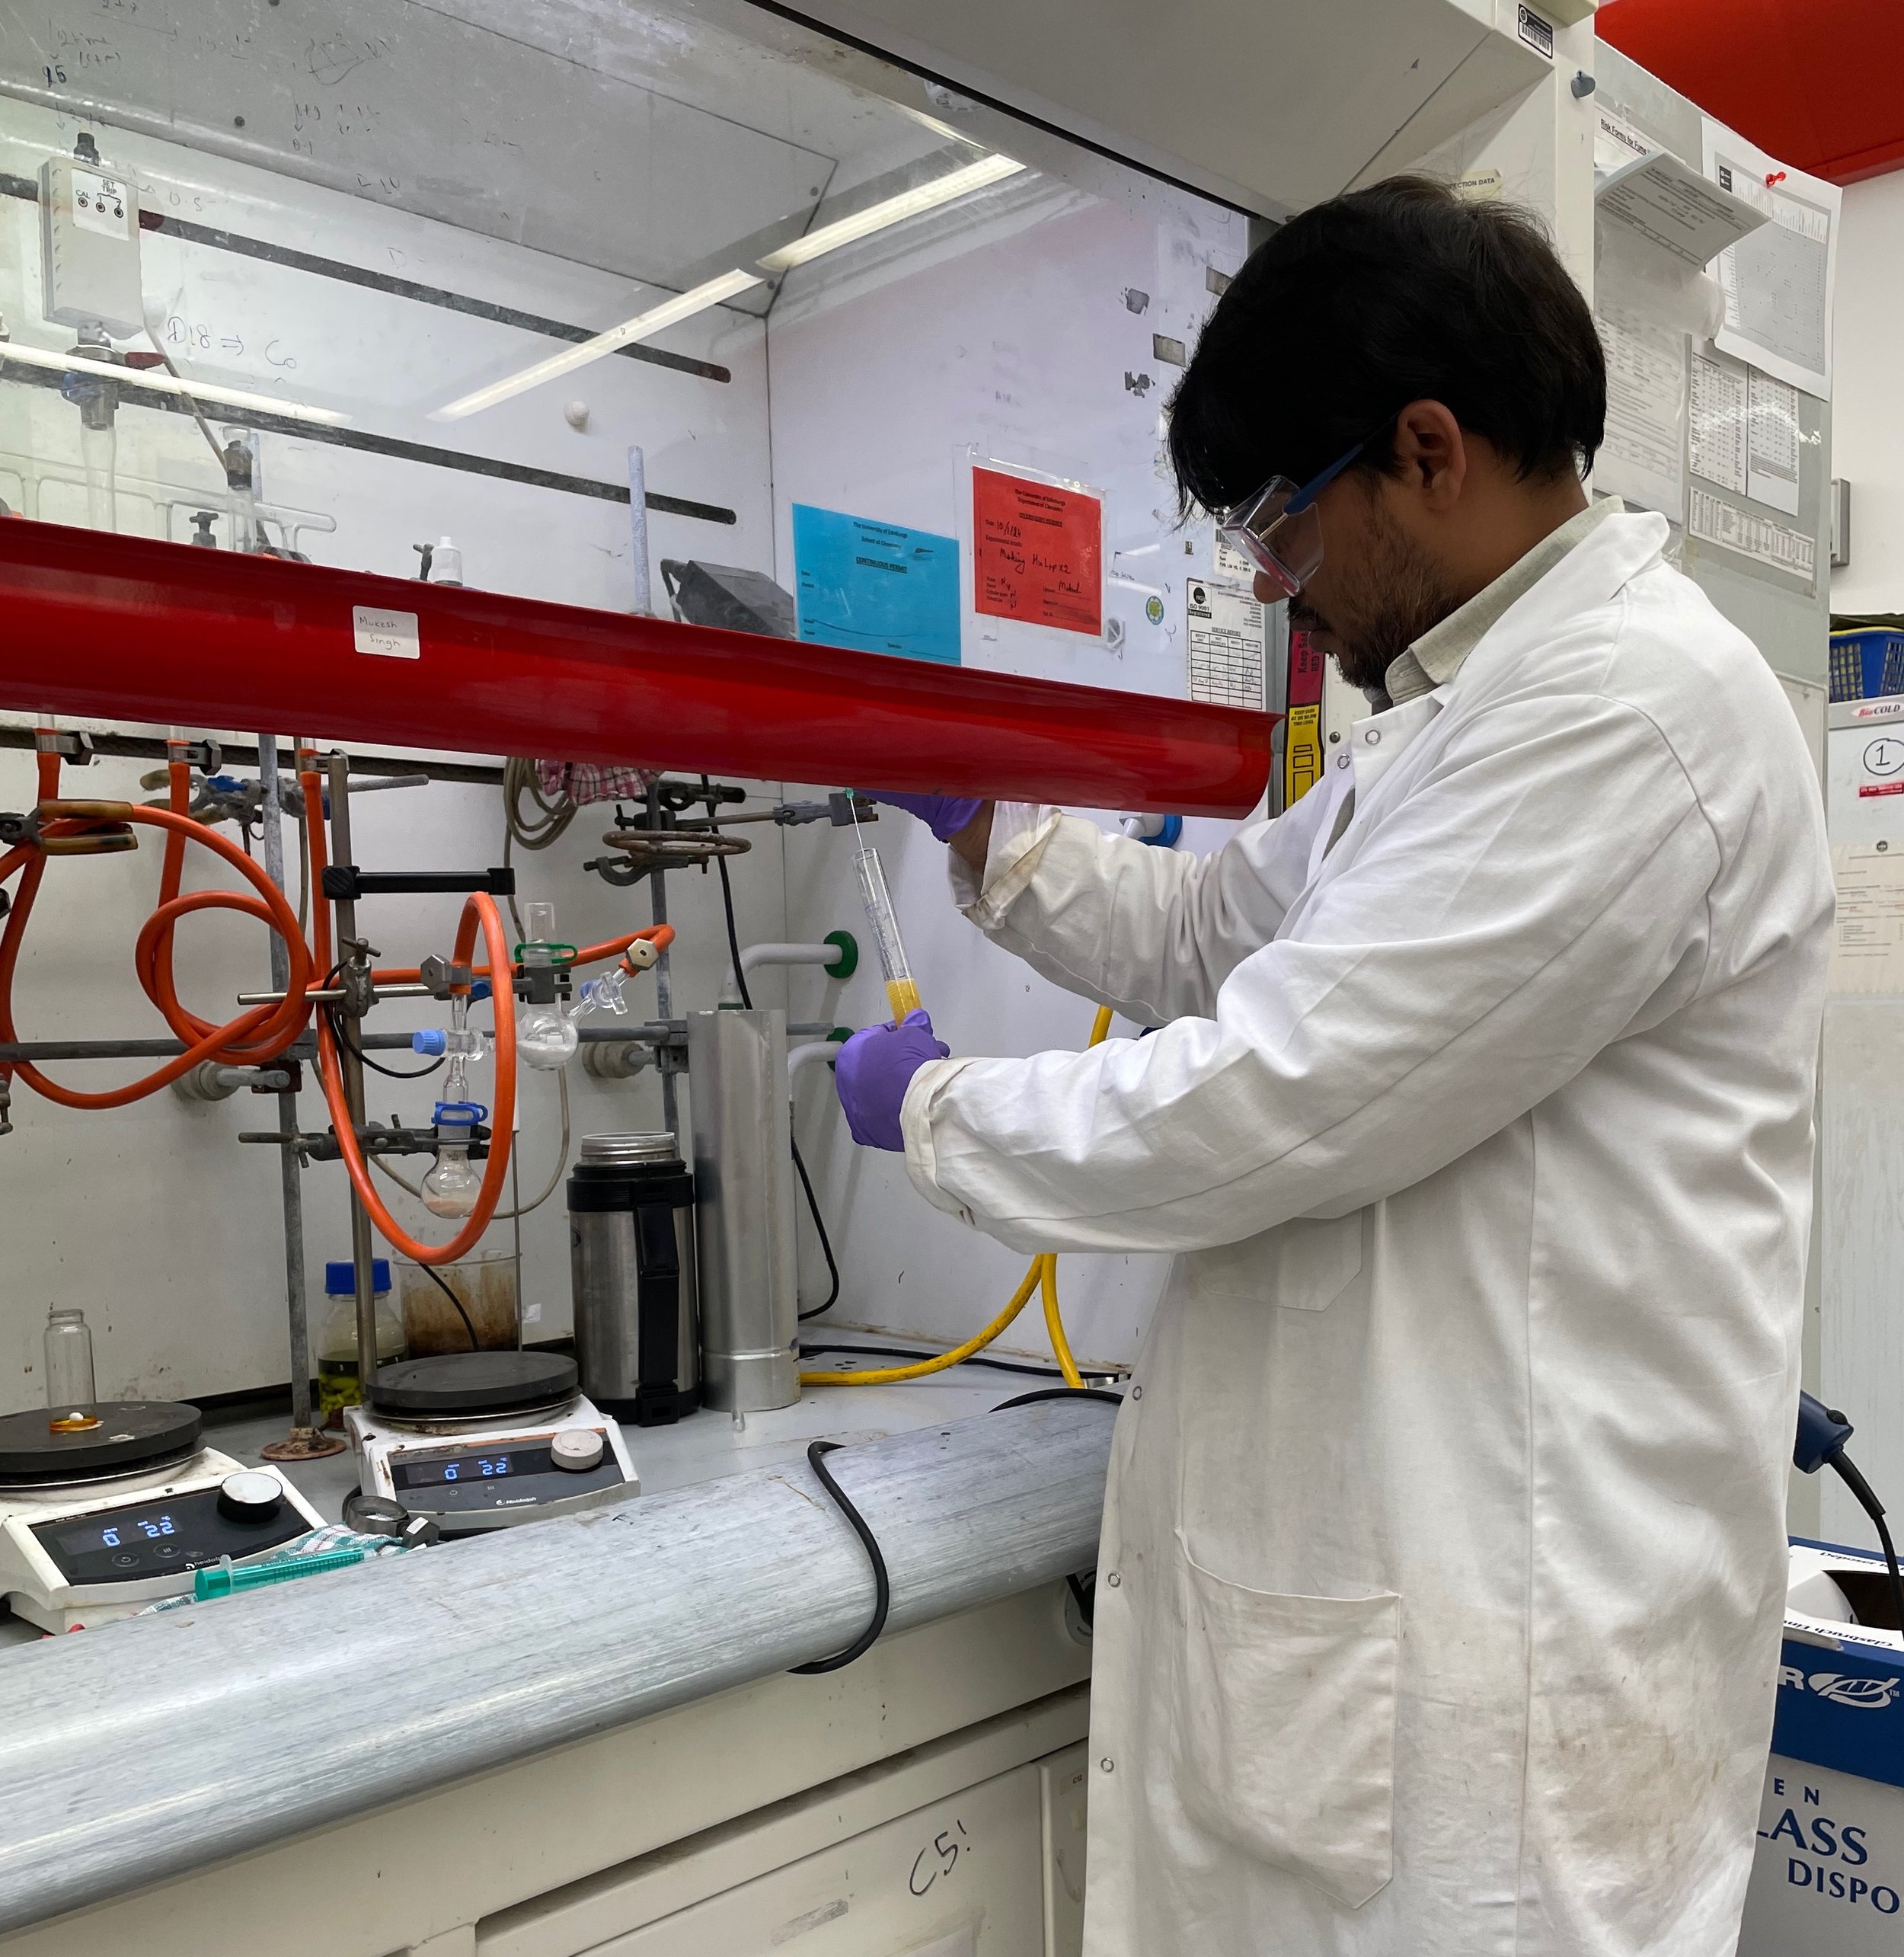

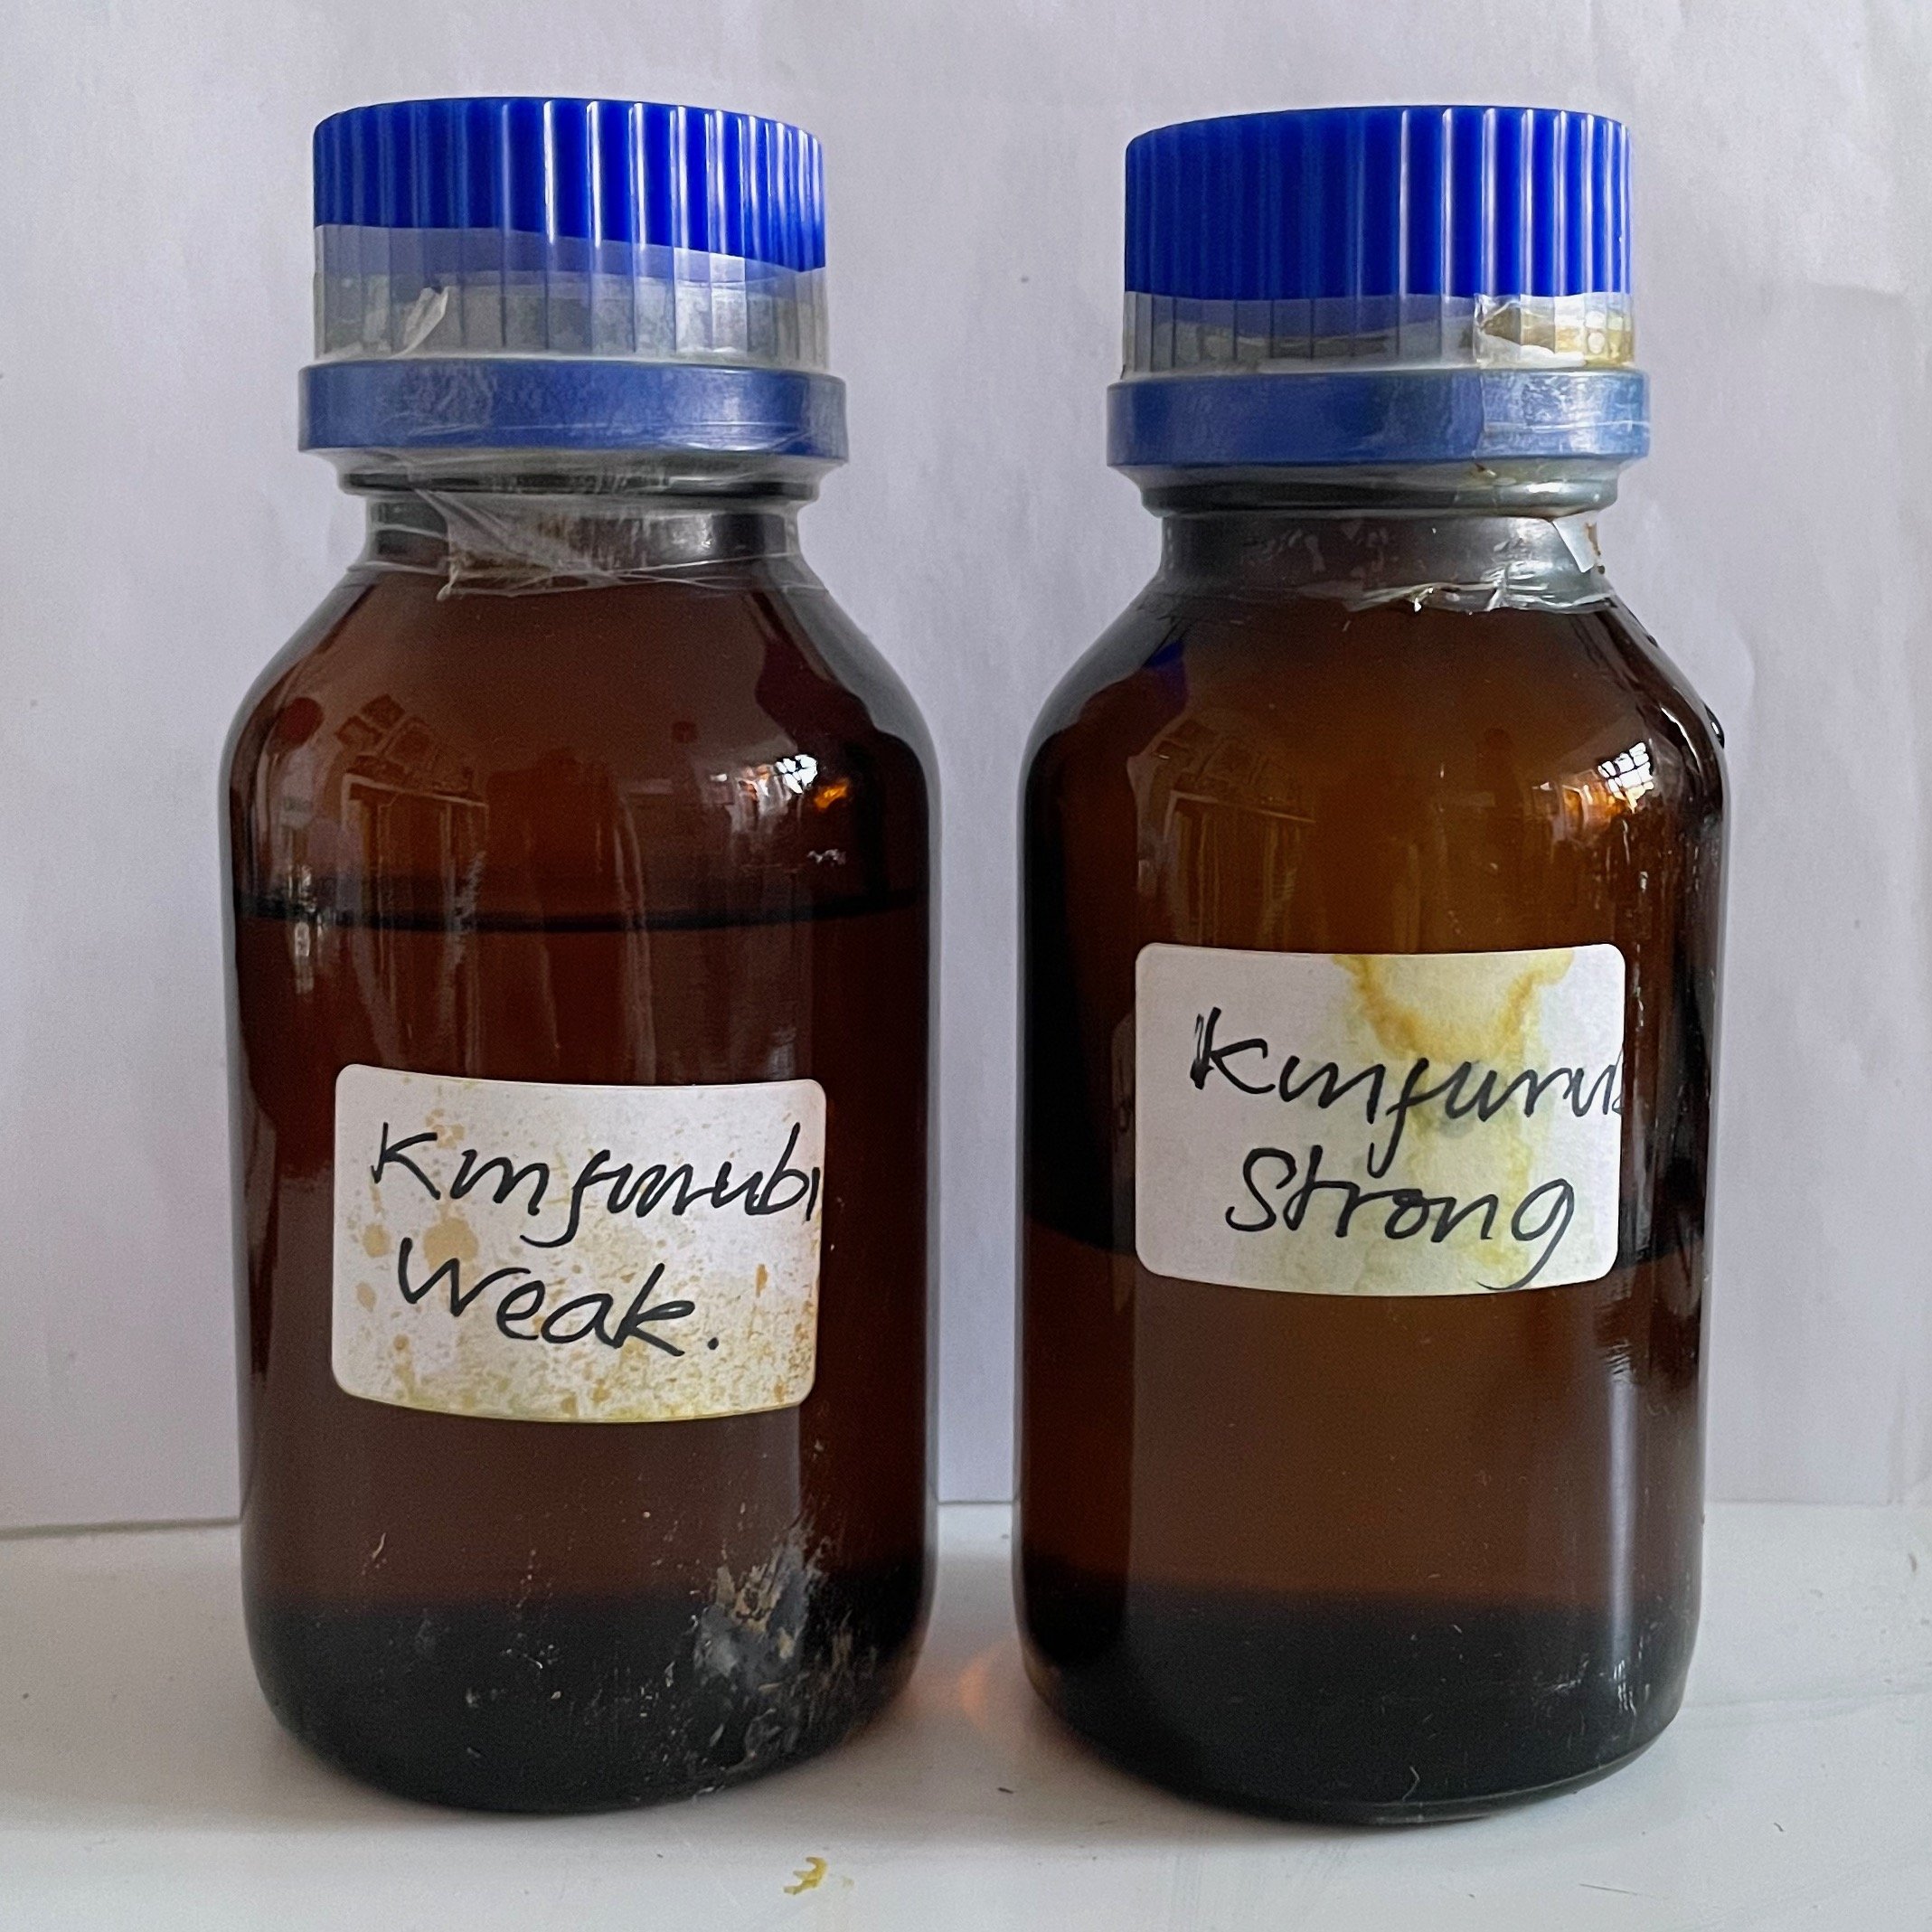
In the lab we created two solutions - a weak solution that had less than 1g of gold concetrate and only 20 - 30mg iodine. The strong solution had 1g gold concentrate and 50mg iodine. The weaker solution appears to create more brown shades and the stronger solution darker greys and blacks. I kept both solutions in brown glass bottles which block out UV light. I experimented with 950 silver and sterling silver.
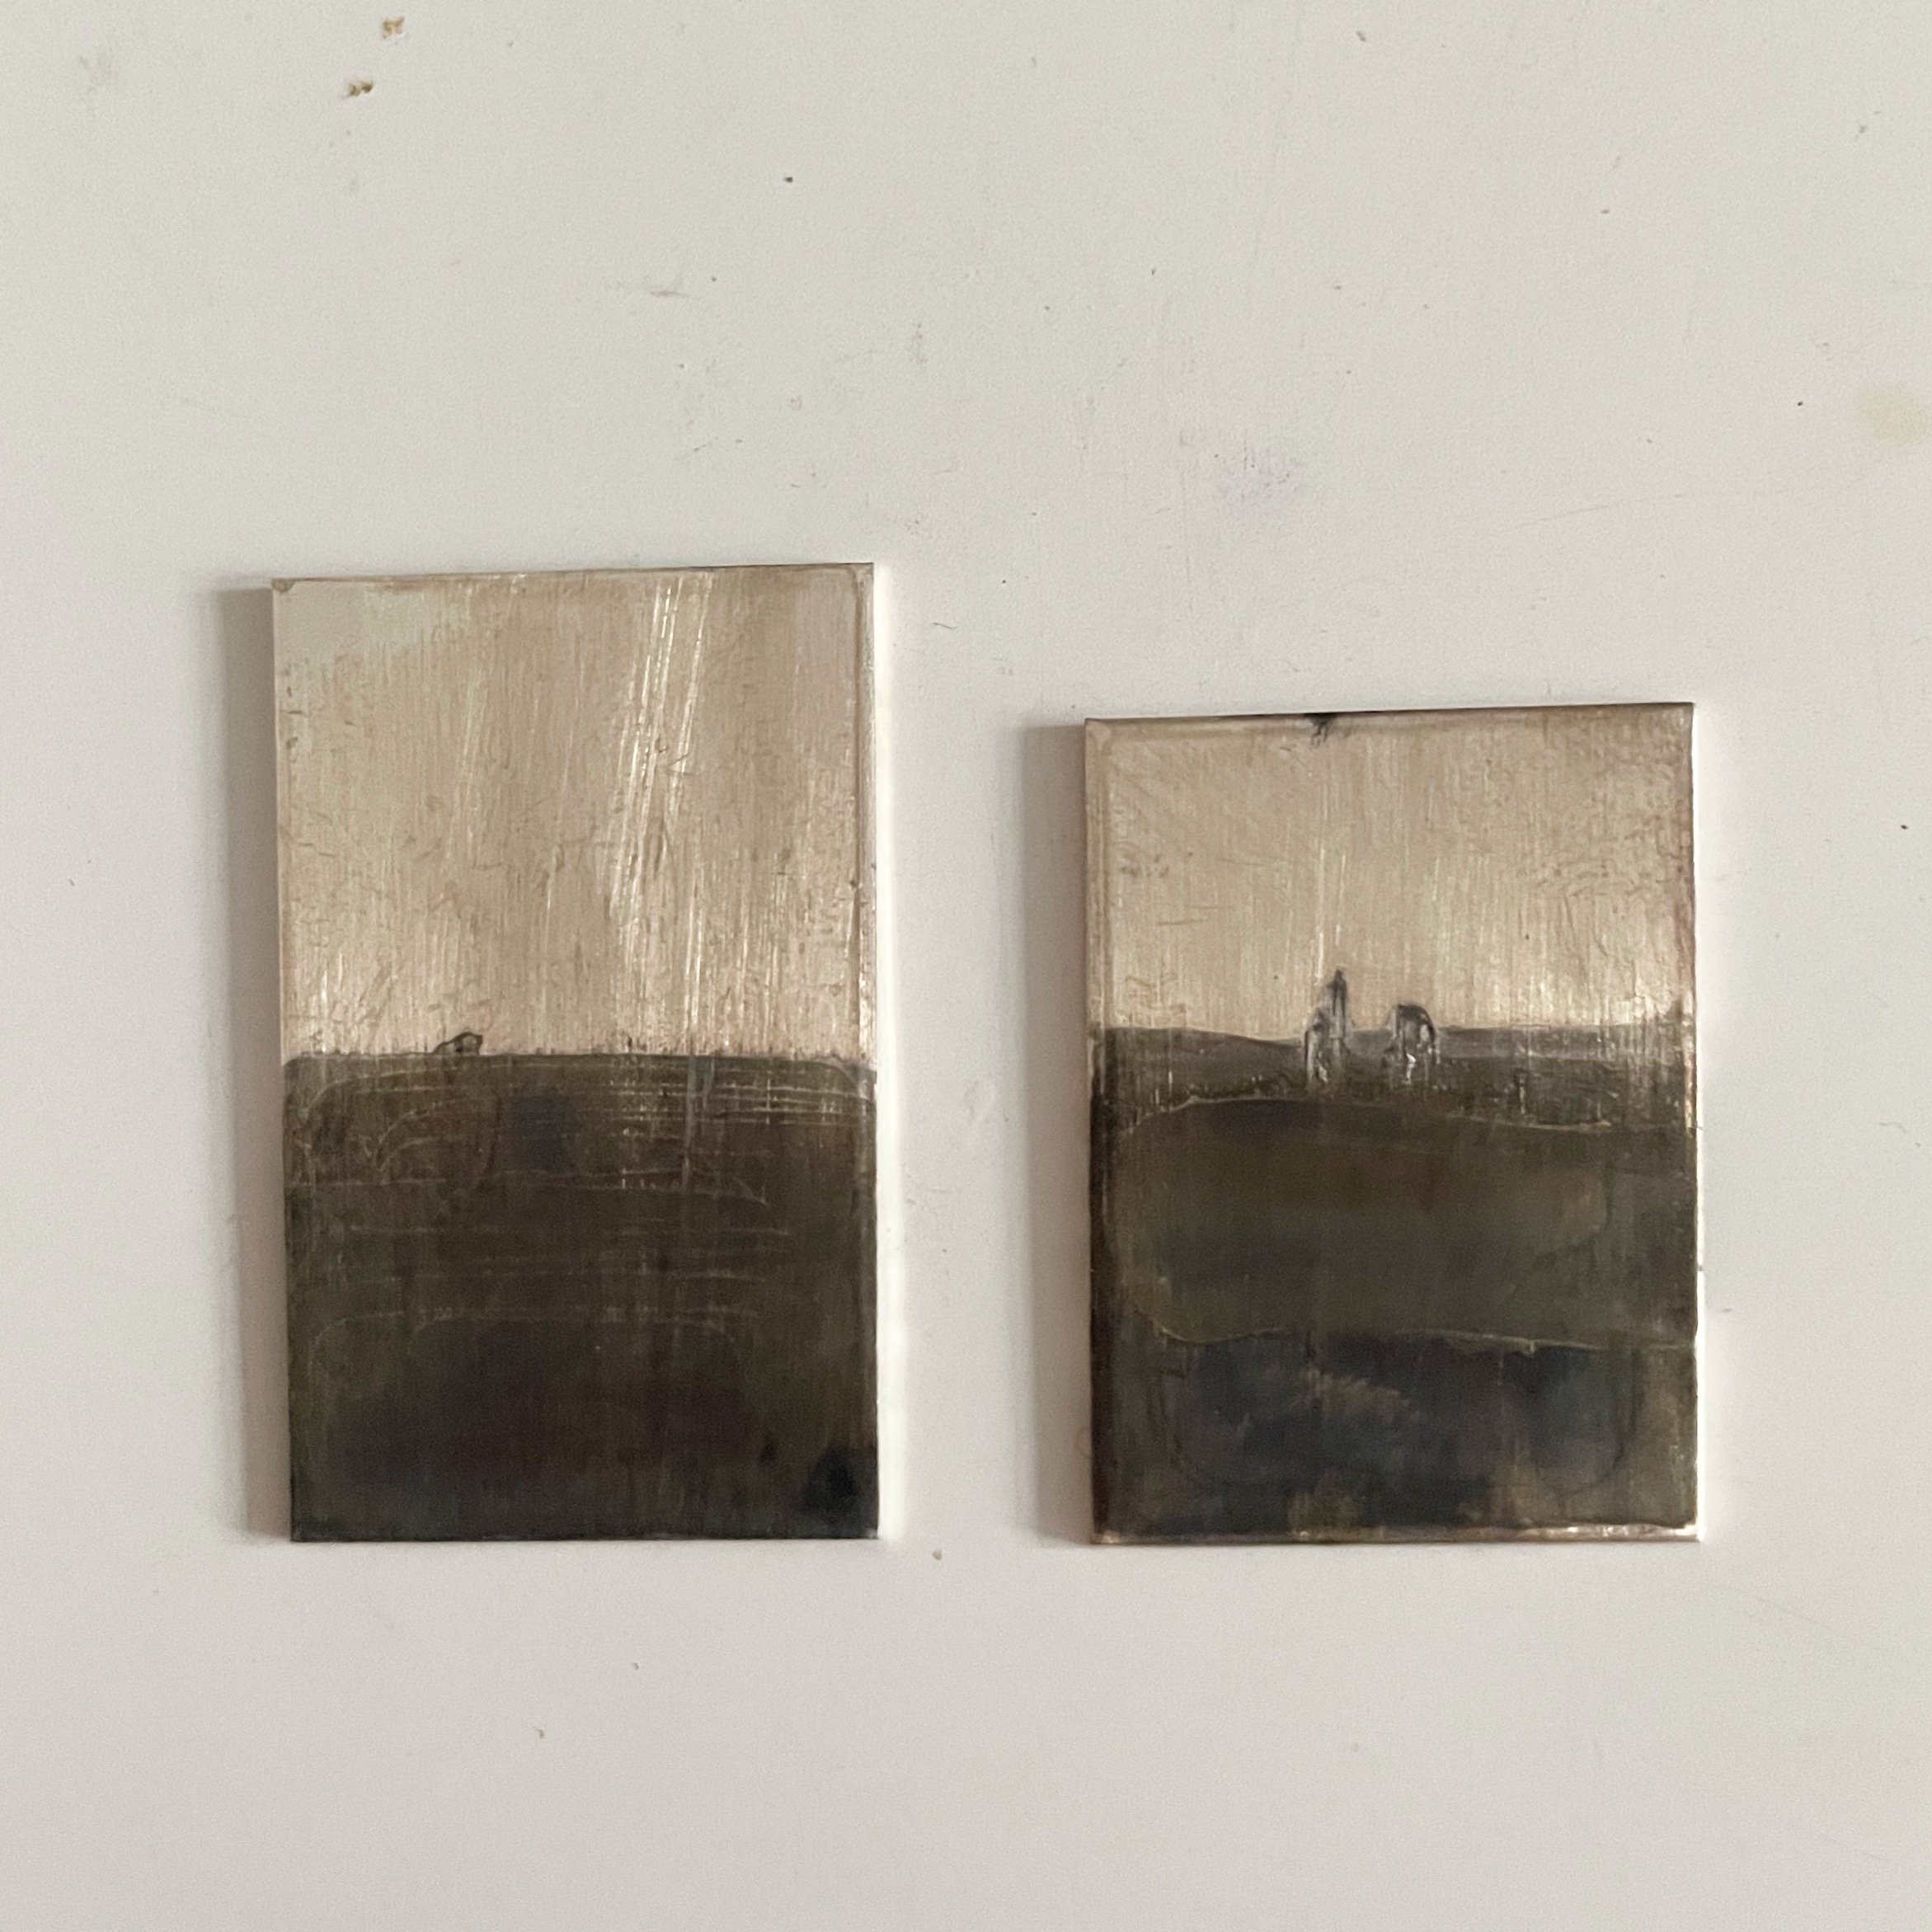
Kin-furubi can be applied with a paintbrush or cotton bud to a clean metal surface. The dark effect on the metal is quite instant and so could also be used to paint brush strokes onto metal. Before applying kin-furubi clean the silver with a paste of baking soda. Let the object dry preferably in direct sunlight but you can also use a UV nail light box to dry. Apply the kin-furubi solution - when the piece turns black, rinse in running water and rub with a paste of baking soda until the desired effect is reached. You can also use fine steel wool to remove the patination from higher areas, as I did in the pendant piece at the top of this post.
Its important to remember that this patination solution only works on silver and not on copper.
The final stage is to seal with wax - either renaissance wax or as in Japan, ibota wax that is derived from the secretions of an insect. I bought some of the ibota wax in granules that can be heated in a small muslin parcel and smeared across the metal to seal. Wait at least 24 hours before sealing to ensure the work is completely dry.
Mariko Sumioka from the Aokin school suggested to me that Kin-furubi is a stronger longer lasting patination than liver of sulphur and the effect is not so harsh, not so dark. This solution therefore provides both chemical protection and aesthetic interest. Importantly for my research, gold chloride which is an output from the hydro-metallurgy process of recovering precious metals from electronic waste can be utilised in creating this patination solution. So a kin-furubi patination solution could have not only aesthetic and protective value but also contribute to a responsible making practice.
With thanks to the Aokin School, Mariko Sumioka, Kenji Io and Edinburgh University Chemistry Department. Special thanks to the Daiwa Foundation who supported this research in Japan.

Nunome Zogan
Gold is included on the European Chemical Society’s Endangered Elements list (2019). Gold is considered of “limited availability with a future risk to supply”. Gold, although found in many localities in Japan was never abundant. Japan’s frequent sumptuary laws also meant that gold was always a metal to be used sparingly. Consequently, Japanese metalsmiths developed various techniques that use a minimal amount of gold for maximum effect. These techniques include creating gold alloys (eg. Shakudo 95% copper 5% Gold), depletion gilding (bringing the gold to the surface) and different types of overlay and inlay that use thin gold foils (eg. 0.02mm thick).
Nunome Zogan means cloth weave overlay and uses very thin foils - 0.02mm thick and the gold is attached to the base metal by creating a cross-hatched ground made with chisels. Around 7 - 9 chisel marks per mm created in three different directions at 45 degrees to each other. The technique is a type of Damascening that was introduced to Japan by the Portuguese in the 16th Century.
The technique was originally used on Iron and Steel to decorate weapons although more recent practitioners have expanded this to include copper, brass and sterling silver. I have been experimenting with this technique on sterling silver. It is a difficult technique to master as very little information is available. This is perhaps in part due to the Japanese teaching philosophy which encourages the student to discover for themselves what works as part of their education. I am particularly interested to see if the gold recovered from electronic waste can be rolled into thin foils and used in this frugal technique.

Candelabrum Repair

I’m a big fan of the BBC TV programme ‘The Repair Shop’ that restores to their former glory people’s precious family heirlooms that have fallen into disrepair. I prefer it to ‘The Antiques Roadshow’ which tends to focus on the monetary value of heirlooms. In contrast, The Repair Shop is concerned with the emotional value of the objects and the connection they provide to lost loved ones. So last year when I was given the opportunity to restore something belonging to my University of Dundee family, I was excited and nervous in equal measure. The University of Dundee Museum Services has the responsibility of looking after the University’s silver collection and Matthew Jarron, Museum Collections Curator, approached me to ask if a piece could be repaired. The piece that had become broken was a candelabrum, described in the catalogue as a ‘branched candelabra with five candle sockets in bowl’ (sic) made in 1957. The dimensions of the candelabrum are 32.5 x 24x 35.5cm so it’s a sizeable work – the biggest I’ve ever had to work on. In researching this blog post I also discovered that the candelabrum is one of two belonging to the University.
The candelabrum had been designed and made by English silversmith Leslie Durbin (1913 – 2005) who trained under Omar Ramsden. During a period of the growth of universities his business did well from a number of commissions for ceremonial silverware. Durbin is perhaps best known for his work on the ‘Sword of Stalingrad’. The sword was presented to Joseph Stalin in 1943 by Winston Churchill as a homage from the British people to the Soviet defenders of the city in the Battle of Stalingrad. We know the candelabrum is by Durbin because of the hallmarks on the silver. Hallmarking has been around for over 700 years and determines the quality of the metal, the maker’s mark and the year the work was made.
In this case the stem of the candelabrum had fallen through the base – cutting straight through - perhaps from the weight of the candle sockets themselves or more likely from a weight being placed on top of the stem. There were also several dents in the base that needed to be hammered out.
Hammering out the dents in the base of the work was tricky as I had to find a steel stake roughly the same curve as the base. I have a series of radius gauges that that I learned how to make and use in silversmith Adrian Hope’s workshop. These are differently angled curves, so I could place one of these over the curve of the base and then use it to try and find the same curve in a corresponding stake. A profile gauge also performs the same function. Gentle tapping with a planishing hammer slowly removed the worst of the dents. The real challenge was to determine how best to reconnect the stem to the base. I could just hard solder the two pieces back together again – however I was unsure if this would create the secure connection that I was looking for. I decided to add a silver disc between the two sections. The bottom of the stem was soldered to the disc and the disc was attached to the base effectively creating a shoulder for the stem and strengthening this central area.
You can learn a great deal from studying the work of another silversmith. For example, I was surprised at the thickness of the silver sheet that he was working with - over 1mm thick in places - making this candelabrum a robust and sturdy item for the table. The wire soldered around the outside edge was something that was very fashionable around the time it was made but is not something that we teach now, partly because this skill has been lost. Rod Kelly is a Scottish silversmith based in Shetland who has recently documented on Instagram the process for attaching a wire to a large plate. This is a process that takes hours of painstaking work, attaching and then hammering out the warping created from the work being heated. Another challenge encountered in this repair was trying to polish the hammer marks made from taking out the dents. The polishing machine in our workshop was not quite big enough, and we do not have a pickling pot big enough to take the work!
I hope that the repair I have made is an elegant solution, as the disc also echoes the wire soldered around the outside edge of the base. The disc is also an addition to the work, a little piece of me. This is akin to the Japanese art of repairing objects – Kintsugi - that treats the repair as part of the history of the object and doesn’t try to disguise it. Now that the candelabrum is repaired it has returned to being used at the table for University dinners and ceremonial occasions and will hopefully continue to serve for at least another 60 years.